Rapid Assembly and Design Challenge (RAD)
Request for Proposal: Rapid Assembly and Design Challenge (RAD)
Introduction and Overview
In a rapidly progressing and innovation-focused world, there is constantly a push for revolutionary new ideas. As the future of engineering, you have been called upon by the National Academy of Engineering (NAE) in collaboration with the NYU Tandon School of Engineering to propose and develop upon unique, intriguing ideas that will promote technological advancement and improve quality of life. The NAE wants to see how the new generation of engineers will address the Engineering Grand Challenges and technological problems the world faces. They want to reward innovative and exceptional designs and prototypes.
Your team is tasked with identifying a problem that needs to be solved or addressing a prompt-based problem, and then moving forward to develop a proof of concept solution. At the end of the semester, you will be expected to have a working prototype that you can showcase to your professors and teaching assistants. The products that show the most creativity, promise, and innovative excellence will be awarded. The goal of this endeavor is to address an engineering problem that you believe you can solve or begin to solve. You have the freedom to propose any idea you believe to have merit, be it a completely new technology or one that you aspire to adapt. If your proposal is selected, then you will be expected to move forward with your idea and have a concrete prototype by the end of the semester. You will be graded on the effort that is put into the project and in understanding the engineering design process, as well as your ability to explain what you learn from your engineering design endeavor.
Specifications
An upperclassman mentor from the General Engineering Program will be provided to you. This mentor will act as a guide for you throughout the duration of this project. They will set the requirements for your project, and stay in contact with you about what deliverables will be due and when.
You have the freedom to propose an idea based on innovation and/or solving an engineering problem. Once your proposal has been selected by professors and other staff, you will work with your team to meet the goals that you, your mentor, and the professors have agreed upon. To understand the scope of your project, you have a theoretical budget of $100, which will be used to determine what and how many parts you should purchase in theory. You do not actually receive the funds, but rather should design a prototype to stay within this given budget. You will need to submit all deliverables, meet Benchmarks, and complete Milestone presentations on time. Student prototypes will be judged by professors at the end of the semester, and the best teams will be awarded a prize.
Along with your mentor, there will be additional Technical Open Lab (Tech OL) TAs on-shift during Open Lab hours. The Tech OLs will help you solve a problem, help connect you with other TAs for specialized help and training, and help you through this project in any other way possible. Your mentor will be your main point of contact throughout the semester, but any Tech OL or Open Lab TA will be able to provide additional support during all Open Lab hours.
Lastly, the Research & Development Committee of EG1003 has developed an Technical Online Library to provide you resources for help in web development, cybersecurity, game development, app development, programming languages, Arduino, Raspberry Pi, LEGO robotics, and more. The online library can be found here:
Example Project Ideas
Check out the RAD projects students worked on in the recent years by watching the following video:
Access this Google document for more information on potential project ideas.
Review the National Academy of Engineering Grand Challenges for Engineering and the United Nations Education for Sustainable Development Goals reports to help you identify a global challenge that you are passionate about:
- National Academy of Engineering. (2008). Grand Challenges for Engineering. The National Academies Press. Updated 2017, Retrieved from http://www.engineeringchallenges.org/challenges/11574.aspx
- United Nations Educational, Scientific and Cultural Organization. (2017). Education for sustainable development goals: Learning objectives. UNESCO Publishing. Retrieved from https://unesdoc.unesco.org/ark:/48223/pf0000247444
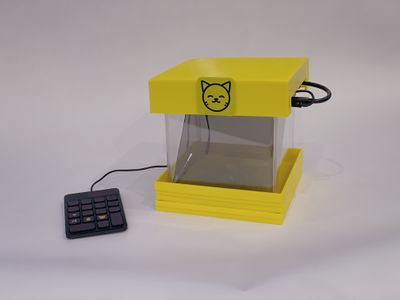
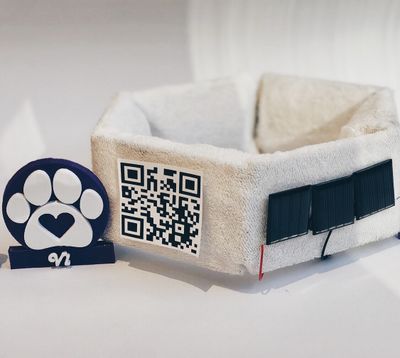
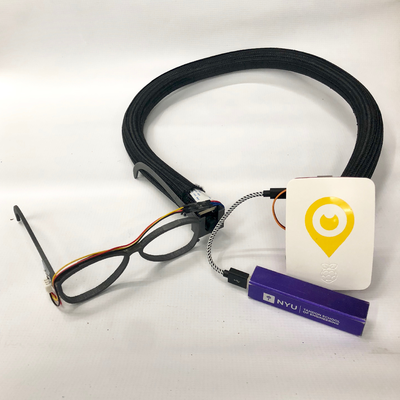
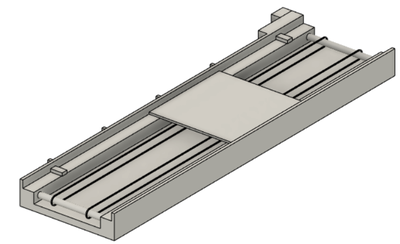
Below are examples of final prototypes of past RAD projects. This is the expectation of a RAD project:
Drawings
You will be required to draw a CAD model of your device for Milestone presentations and Benchmark assessments. You can use any CAD software to do so. EG1003 uses and teaches Fusion 360 for labs and other SLDPs, and Fusion 360 is the recommended software for CAD. You can download Fusion 360 for free using your NYU email. Other CAD software such as SolidWorks, Inventor, and Rhino are permitted, however EG1003 does not provide resources in obtaining or learning those programs. Using your chosen CAD software, create four drawings of the device: front, top, most detailed side, and isometric. Sensors and motors must be included in each drawing.
Each revision of the design must be documented and all changes must be presented during Milestone presentations.
Diagrams
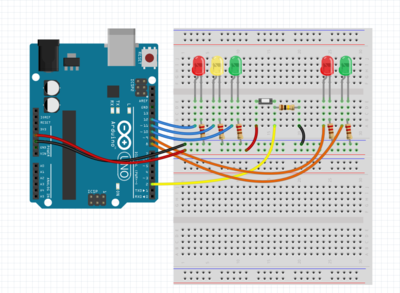
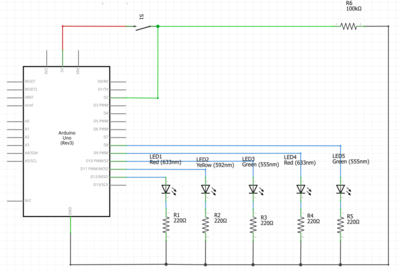
You will also be required to create a circuit diagram and a schematic diagram of your device for Milestones, presentations, and Benchmark assessments. A circuit diagram visualizes a lifelike representation of your circuit, concerning the physical layout of the wires and how they're connected to the components. (Figure 5). A schematic diagram shows the plans and functions of your circuit, but is not concerned with the physical layout of the wires (Figure 6).
EG1003 recommends the circuitry modeling softwares Tinkercad and Fritzing to fulfill these deliverables. Tinkercad is a free browser-based circuitry software that is especially useful for constructing circuit diagrams with common electrical components. For projects with more complex electrical components, Fritzing is a free circuitry software with an encompassing library of electrical components that is useful for constructing circuit diagrams and schematic diagrams. For a guide on using both softwares, please refer to the Virtual Circuit Simulation Guide.
Project Schedule
A project schedule must be created in Google Sheets. Please refer to the template provided in your team Google Drive folder and our guide.
This schedule must include all tasks related to the project from the start of the project to Early or Final submission. The project schedule should include:
- Minimum of 20 tasks, excluding Milestones
- Milestones should be clearly indicated on the project plan (duration of zero days)
- Each task must include the person responsible for completing the task (resource names)
- Gantt chart must be displayed alongside the tasks list (fit onto one slide)
- Gantt chart must show a progress line
- Clearly state during the presentations whether the project is on-time, behind schedule, or ahead of schedule
- In milestone presentations, please present a “Project Status” slide, which should summarize key deadlines. You are not required to show your project schedule in these presentations
Cost Estimate
A cost estimate must be generated that specifies the cost of all the materials and labor required for the construction of the proof of concept. Tabulate this cost information clearly in an Excel spreadsheet. Help in calculating the cost is available by reviewing Planning Project Scheduling & Costs. Any adjustments or changes over the semester in your cost estimate from the one implemented in your Preliminary Design Investigation must be documented and shown to your mentor, as you have a maximum budget of $100.
The cost estimate should include the following:
- Labor cost breakdown with hours and rates
- Cost of all materials and components
- Total cost must be shown in the bottom right corner
There should be no decimal places in the cost estimate as this is purely an estimate. Be sure to round appropriately.
Purchasing
You will have a budget of $100 to complete your project. Purchases can for materials that EG does not already have. You can find the list of materials available for all RAD groups here:
Purchases can only be made for items on Amazon. You can submit requests to purchase items through the Purchasing Form. After submitting the purchasing form, you must get your purchase approved by your mentor. The Purchasing Form can be found here:
In order to simplify this process, purchases must be approved by midnight. Purchases will be submitted by the department later that week. We cannot guarantee that purchases will arrive in a timely manner - make sure items are prime eligible for faster delivery and the item must ship in less than 7 days. Think ahead and order on time.
Purchase requests must be submitted by 8:00 PM of the following days in order for purchases to go through:
- July 23, 2021 (Week 3)
- July 30,2021 (Week 4)
- August 6, 2021 (Week 5)
Additional Funding
There are other ways to receive additional funding for your RAD project in EG1003. One way includes applying to the EG1003 Innovation Grant. Your application will be reviewed by the last purchasing date. This grant is for projects that are able to create a working prototype with the initial budget, but are able to make an even better prototype with the additional funding. All purchases with the group's initial budget must be made before applying to this grant. The group's mentor must be notified if the group wants to apply for the grant. The deadline to apply is August 4th. The Innovation Grant Application can be found here:
Weekly Meetings
Your group must schedule and attend weekly meetings with your RAD mentor. Your group must choose a time slot together and abide by that time slot for the remainder of the semester. Your RAD mentor will set your Benchmarks and extra credit tasks. For additional technical help, go to Open Lab and a Tech OL or Open Lab TA will assist you with your project.
Engineering Notebook
While working on your project, you are expected to keep a record of all work done, as well as future plans and goals. In order to complete a Benchmark assessment, show your Engineering Notebook to the Open Lab TA completing your assessment. For Milestone 2, Milestone 3, and Final Submission you must have it approved by an Open Lab TA in a Word Document (DOC or DOCX) format. A guide to writing the notebook, as well as a basic overview of its expectations and frequency at which you should log in your notebook, can be found on the Keeping an Engineering Notebook page.
Extra Credit
RAD Groups have multiple options for receiving extra credit:
- Extra credit tasks determined by your mentor based on your specific RAD project. Usually, your mentor will give you an additional 2-3 tasks to complete by Commissioning, which can be up to 15 points total.
- Completing Benchmark A, Benchmark B, or Submission early, or completing your respective SLDP's 3D printing extra credit task as described in the. Refer to the EG1003 Grading Policy for exact point values.
- Creating a 3D printed two-color logo through the EG1003 Prototyping Lab. More information can be found on the Prototyping Guide.
Creativity and innovation are always rewarded. Original designs will receive extra credit at the discretion of your Recitation professor.
Milestones, Benchmarks, and Deliverables
As you work on your project, you will be required to present periodic reports on your progress. We call these Milestones. All the items assigned in each Milestone are called deliverables. These deliverables often consist of a combination of written submissions, presentations, and demonstrations. Additionally, you will be required to meet certain benchmarks assigned by your mentor, and hand in reports/deliverables that add to the progress and comprehensiveness of your project. The prototyping guide page contains information on the 3D printing requirements and guidelines.
Note: You are only allowed to get a benchmark and commission approval from a TA for your project at the end of Lab or during Open Lab times or during scheduled meetings with your RAD Mentor.
Preliminary Design Investigation
The Preliminary Design Investigation (PDI) is extremely important, as it lays the groundwork for your project. You will be outlining your project idea, inspiration, and goals.
The PDI must include:
- Cover Page
- Project Overview
- Goals & Objectives
- Design & Approach
- Cost Estimate
- Project Schedule
- Relevant Pictures
An example PDI template can be found here. The PDI is due to your mentor by email by Benchmark A. Do not forget to include the items listed above. Use this link to access the PDI Rubric.
Milestone 1
Milestone 1 should act as a presentation of your Preliminary Design Investigation Report. Without simply replicating your report in presentation format, take the key points to present in a concise and clear manner. The section formatting should be similar to that of the report. It is important that you outline your project goals and show that your project is realizable. This includes:
- Project description (establish Benchmark A, Benchmark B, Commissioning requirements)
- Mission statement
- Technical design description
- Preliminary conceptual drawing
- Cost estimate
- Microsoft Project schedule
- Click here to access the guide on how to transfer a file
- Progress update (current state of the project)
Look Ahead: What tasks are planned between now and Milestone 2?
See How to Give a Milestone Presentation for the format of a Milestone presentation. Because your project will differ in format from other SLDPs, please treat this How-To as a general guideline but not an exact template. Your personalized Milestone 1 requirements and presentation format will be given to you by your mentor.
Benchmark Assessment A
Benchmark assessments evaluate the progress of your project. Benchmark Assessment A is due at the end of Model Shop Session II. There are penalties for not completing this on time. Refer to the EG1003 Grading Policy for more information.
For your Benchmarks, your mentor will outline specific goals that your project must achieve to satisfy the Benchmark. These goals will vary depending on the project and mentor and will be determined based on the particular project's level of difficulty. Please be sure to submit your Benchmark deliverables via the EG1003 website.
Part of your Benchmark is completing and turning in your PDI. When you showcase the rest of your Benchmark requirements to an Open Lab TA, every part of the PDI must be completed in order to Benchmark.
To pass, the design must complete all of the following:
- Tasks assigned by your mentor
- Initial CAD model
- Preliminary Design Investigation
- Updated Engineering Notebook
Milestone 2
See How to Give a Milestone Presentation for the format of a Milestone presentation, but remember that your format will differ slightly. The specifications for the presentation are stated below.
Milestone 2 will be a project progress update. You must explain all changes and developments made thus far, particularly in regards to Benchmark A. Include whether or not you were able to complete your Benchmark A requirements, and if not, explain why. Also, highlight any changes you plan on making to your design or project, in general.
Your Milestone 2 presentation must include:
- Project description (establish Benchmark A/Benchmark B requirements and general project goal)
- Mission statement
- What is your project's purpose?
- Technical design description
- Current CAD drawings:
- top
- front
- most detailed side
- isometric
- Circuit diagram
- Relevant pictures
- Flowchart of Code
- Cost estimate (previous and current). What changes were made?
- Microsoft Project schedule (previous and current). What changes were made?
- Click here to access the guide on how to transfer a file
- Progress update: current state of the project (time, budget, etc.)
Look Ahead: What tasks are planned between now and Milestone 3?
Benchmark Assessment B
Benchmark Assessment B is due at the end of Model Shop Session III. There are penalties for not completing this on time. Refer to the EG1003 Grading Policy for more information.
Similar to Benchmark A, your Benchmark B requirements will be determined and outlined by your mentor. Please submit your Benchmark deliverables via the EG1003 website.
To pass, the design must complete all of the following:
- Tasks assigned by your mentor
- Updated CAD Model
- Updated Engineering Notebook
Milestone 3
See How to Give a Milestone Presentation for the format of a Milestone presentation, but remember that your format will differ slightly.
Milestone 3 will be the last project progress update. You must explain all changes and developments made thus far, particularly in regards to Benchmark B. Include whether or not you were able to complete your Benchmark B requirements, and if not, explain why. Also, highlight any changes you plan on making to your design or project, in general.
Your Milestone 3 presentation must include:
- Project description (establish Benchmark A, Benchmark B, Commissioning requirements)
- Mission statement
- What is your project's purpose?
- Technical design description
- CAD drawings: top, front, most detailed side, isometric
- Circuit and Schematic diagrams
- Relevant pictures
- Flowchart of Code
- Cost estimate (previous and current)
- What changes were made?
- Microsoft Project schedule (previous and current)
- What changes were made?
- Click here to access the guide on how to transfer a file
- Progress update: current state of the project (time, budget, etc.)
Look ahead: What tasks are planned between now and the completion of the project?
Commissioning
Refer to the syllabus for the Commissioning deadline. There are penalties for not completing this on time. Refer to the EG1003 Grading Policy for more information.
To Commission, the following must be completed:
- Fully-functional prototype
- Any additional deliverables designated to you by your mentor
- Website submission of:
- CAD drawings
- Pictures of prototype
- Circuit Diagram (Use TinkerCAD or Fritzing)
- Schematic Diagram (Use Fritzing)
- Code Flowchart
- Commented code
- Project schedule
- Cost estimate
- Engineering Notebook
Final Design Report
The Final Design Report (FDR) provides a comprehensive overview of your project process and developments from initial brainstorm to finished proof of concept. All project expectations and outcomes must be clearly detailed in the document. This report will also provide you with documentation experience useful for completing your Senior Design final report and other projects.
The Final Design Report must include the following documentation:
- CAD drawings
- Wiring diagrams
- Commented code
- Project schedule
- Cost estimate
Use this Final Design Report template with the following outline:
- Introduction
- Purpose of Project
- Background
- Requirements
- Physical Components
- Software Components
- Procedures
- Software Setup
- Software Troubleshooting
- Milestone and Final Product Requirements
- Benchmark A Requirements
- Benchmark B Requirements
- Final Submission Requirements
- Human Resources and Training (e.g. TA expertise utilized, etc.)
- Results
- Benchmark A Results
- Benchmark B Results
- Difficulties Experienced
- Conclusion
- Results of Project
- Future Improvements
Final Presentation
Final presentations for RAD teams are not like the Milestone presentations. Students will be doing a business pitch to showcase their work, their product, and their business. This pitch involves a 2-3 minute presentation to show who you are, your business, and pitching your project to theoretical investors. Focus on topics such as the project application, a target audience for this product, why it's different from other products on the market, and the product's market value. The presentation should be colorful and coordinated. There should be equal amounts of graphics and text. You should focus on keeping your audience engaged and interested in your product as you go through the presentation. Feel free to be creative with the Final Presentation! The following must be addressed in the Final Presentation:
- Problem statement
- Solution overview
- What is the purpose of your product?
- Who is it helping?
- What problem does it solve?
- Company description and qualifications
- CAD Drawings
- Circuit and Schematic Diagrams
- Flowchart of Code
- Project description
- Future goals
- Why should the company be awarded this contract?
- Why is your product the best one on the market?
- What makes your project unique?
Some examples of RAD Final Presentations can be seen below. A video with demonstrations of the physical prototype must be included in the presentation. Exceptions will be made for fully remote RAD groups.
Submission
All SLDPs must submit online. Please visit https://eg.poly.edu/finalSLDP.php for the link to the Project Submission form and each SLDP group's individualized login information. To submit, you must login to the EG1003 website using this special login information. Submitting with your NYU account or any other account will generate an error. You may resubmit at any time before the deadline. Please note that submission times are based on the most recent submission.
Please note the deliverables for this project are as follows. If any of the following items are omitted, you will be penalized. Be sure to click submit at the bottom of the form.
The following list are general items that are expected from all RAD groups:
- Cover page
- Final presentation
- Commented code
- All CAD drawings of your design (initial through final)
- Video of the device completing all Commissioning requirements, and any additional Extra Credit tasks
- Final Microsoft Project schedule
- Final cost estimate
- Resume(s) (no fictitious resumes will be accepted)
- Final Engineering Notebook
Late Submission
Late submission is not allowed. If a project does not Commission or receive Partial Commission by the deadline set forth in the syllabus, the project will not be allowed to submit and will receive a 0 for the project grade. To receive Partial Commissioning, two TAs must evaluate the project and determine its degree of completion according to the Commissioning requirements and the project will be given a grade accordingly. Please refer to the EG1004 Grading Policy for more information.
Frequently Asked Questions
Q: What happens if we want to change our project idea?
A: Project changes are reviewed by your RAD mentor and Professor on a case-by-case basis. Please talk to your mentor if you would like to pivot your project.
| ||||||||
