Revit-How-To Guide
Architectural
Setting up
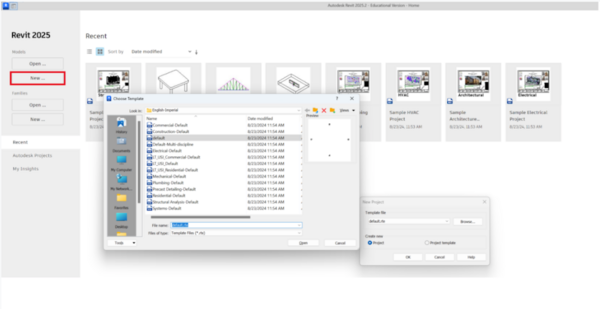
Open Revit. Select New, then select Architectural Template (Figure 1). Each template is used for a different type of design. For architectural designs, this template will be used.
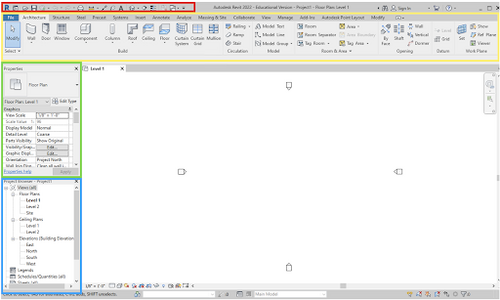
There are four major sections used to create and modify a design in Revit. The Quick Access Toolbar is highlighted in red, the Project Ribbon is highlighted in yellow, the Properties panel is highlighted in green, and the Project Browser panel is highlighted in blue (Figure 2). If any of the sections are accidentally removed from view, they can be reinserted by going to View → User Interface (rightmost icon) in the ribbon.
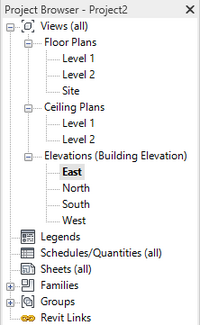
An important aspect of setting up your project is defining the levels (the story heights for the building). Navigate to one of the elevation views, in this case the East elevation, in the Project Browser by double clicking (Figure 3). Each plan view or elevation view will open in a new “tab” that you can toggle between.
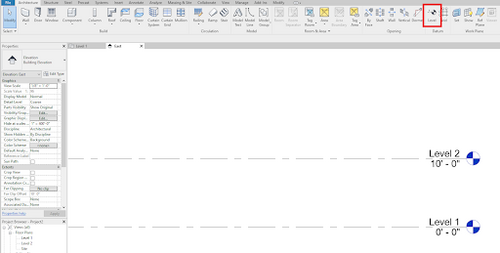
To add a new level, select Level in the Architecture tab (Figure 4). Click a point above the current top level, usually 10’, then move your cursor horizontally and click again to place the level. To delete a level, just click on it and press “Delete” on your keyboard.
To view your 3D model, go to the “View” tab in the toolbar, under the “Create” subtab, and click “3D View” (Figure 5).
Along the bottom of your window is a toolbar with various symbols. Hover over each symbol to figure out what each one does. The most important functions in this toolbar are the two symbols highlighted below (Figure 6). The first is the Visual Style for the model. The Wireframe view is the most useful style to work in because you can see through all your objects. If you would like to hide certain objects while you are drawing, right click on it and click “Hide in View”. Hiding an element means only hiding the object you selected. Hiding a category means hiding every object that is in the same category as the object you selected (ex: hiding all furniture). The Reveal Hidden Elements function (the lightbulb symbol), when clicked, shows everything that you have hidden in pink, along with your existing structure. These two functions are helpful when you want to build on the interior of your structure, but your walls are blocking your vantage point.
Building
In the Project Browser column, go back to Level 1 under “Floor Plans”. You should always be building from the ground up, so start at Level 1. To start, select the “Wall” function under “Build” in the “Architecture” tab of the toolbar (Figure 7). Build an Architectural Wall.
When you click on the function, a new tab called “Modify” should appear on the far right of the toolbar. This happens for any new structure you select under Build. Click what type of line or shape you would like to draw and draw it on your view (Figure 8).
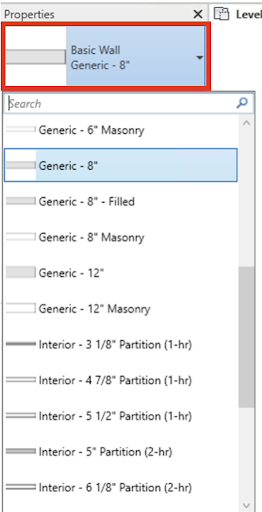
In general, your walls should be 10’ high, but this can be customized per your design. Exterior walls should be 8” thick while interior walls should be 6” thick. The thickness of the wall can be changed in the drop-down menu in the Properties panel (Figure 9).
If you made a mistake in the length of your walls in your initial drawing, you can always double click on the dimension in blue and change it manually by typing in the correct value (Figure 10). Once you are done modifying the wall,or placing any component, press the “Esc” key to reset to the main screen.
