Prototyping with Microcontrollers and Sensors
Objectives
The objective of this lab is to utilize the basics of electronics, the Arduino board, and the Arduino IDE (Integrated Development Environment). The Arduino IDE will be used to program the Arduino board. These skills will be used for several hands-on tasks including programming the Arduino to control an LED with a button, take readings with a temperature sensor, and design a basic prototype for a product.
Overview
Electricity
To put simply, electricity is the movement of electrons. Electrons flow through a conductive wire when there is a difference in charge between two points in the wire. This flow of electrons is called electrical current and it is measured in Amperes (A). Due to convention, electrical current flows opposite of the electrons. The difference in charge is called electrical voltage and it is measured in Volts (V). Another way to think about electrical voltage is to picture it as “electrical pressure,” analogous to water pressure. If there is a tank full of water (electrons) and a hole is poked in it, water will flow (electrical current flowing), due to the water pressure (electrical voltage) inside the tank. Finally, there are certain materials that resist that flow of electrons. This property is called electrical resistance and it is measured in Ohms (Ω). Resistors are electronic devices that are specifically designed to resist the flow of electrical current.
There exists a mathematical relationship between current, voltage and resistance which is characterized by Ohm’s Law. This relationship is detailed below, where V is the voltage across a resistor, I is the current flowing through a resistor and R is the resistance of the resistor.
Electronic Components
There are several basic electronic components used to build simple circuits. Some of these components are polarized which means the way they are connected matters! Another way of thinking about it is that some components are symmetrical while others are not.
DC (Direct Current) Voltage Sources
DC Voltage Sources are used to power circuits because they have a voltage difference across their terminals. DC Power Sources are usually batteries (AA, AAA, etc). Arduino boards can be powered by a battery, a USB cable, or an AC adapter. When the Arduino is powered, it can be used as a 5V DC voltage source. They ARE polarized.
Resistors
Resistors are components that reduce the amount of current flowing through a circuit. Resistors convert the excess current to thermal energy. Resistors can be used to control the voltages and currents of circuits. Resistors are color coded with what resistance they are. They are NOT polarized.
Capacitors
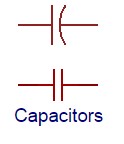
Capacitors are components that can store energy in an electrical field and then dissipate it at a later time. Capacitance is a measure of how much charge a capacitor can store and it is measured in Farads (F). Capacitors resist voltage changes by supplying or drawing current. They are SOMETIMES polarized.
Inductors
Inductors are components that can store energy in a magnetic field and then dissipate it at a later time. Inductance is a measure of how much energy an inductor can store and it is measured in Henrys (H). Inductors resist current changes by dropping or increasing the voltage across itself. They are NOT polarized.
Push-buttons and Switches
Push-buttons and switches are mechanical devices that interrupt or divert current running through them. Basic push-buttons and are polarized while basic switches are not.
Diodes and Transistors (BJT/MOSFETS)
Diodes are components that allow current to only pass in one direction.
MOSFETs are electric components that act as electrically controlled switches. They can also be used to amplify signals. They ARE polarized.
Light Emitting Diodes
LEDs are small electric lights which use low voltages and currents. The orientation of the LED is important since it acts like a diode and only allows current to flow in one direction. Most LEDS also require a resistor (typically 470 Ω) in series with them because they will burn out almost instantly when they encounter high current. They ARE polarized.
IC (Integrated Circuit) Chips
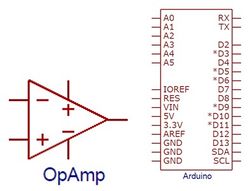
IC chips contain small electrical circuits inside them to usually do one specific purpose. They can come in all shapes, sizes and specifications. Common IC chips that are used include comparators (they compare two different voltages), op-amps (they amplify low voltage signals) and timers (they switch between high and low voltages quickly to time other devices). The blank rectangular components on the Arduino are all IC chips. They ARE polarized.
Analog vs. Digital Signals
An electrical signal is any quantifiable quantity that can carry information using electricity. Digital signals have two discrete states: LOW and HIGH. Generally speaking, most devices output a voltage level of 0V when the signal is LOW and 5V when the signal is HIGH. For example, a comparator can compare two signals and output 0V if the first signal is greater than the second or output 5V is the second signal is greater than the first.
Analog signals, on the other hand, can theoretically take on an infinite amount of voltage values. In reality, analog signals consist of a large range of numbers which are mapped to corresponding voltage values. For example, the Arduino can output a range of analog values from 0-1023 (corresponding to 0V-5V). This means the value 255 will have a voltage value of ~1.246V while the value 781 will have a value of ~3.817V. Many electronic components are inherently analog.
Microcontrollers
A microcontroller is a cheap, programmable computer without any of the peripherals such as a mouse, keyboard, or screen. Microcontroller boards have direct access to the input and output pins of its processing chip so that the user can directly read from sensors and perform actions. Microcontrollers are present in many electrical appliances like microwaves.
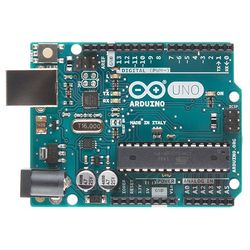
Arduino boards were designed to be easily programmed and assembled into larger projects. These boards come in many shapes and sizes and some contain additional features such as WiFi or Bluetooth connectivity. Different boards can also have different features such as processing speed and memory size.
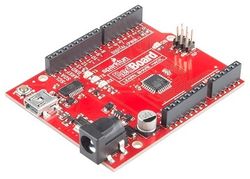
This lab will be using an Arduino UNO board created by SparkFun called a RedBoard.
Arduino Hardware
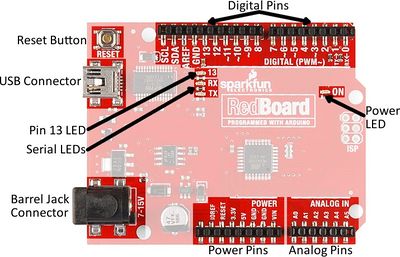
Overview of the RedBoard
Reset Button: Restarts the Board
USB Connector: Provides power and connect it to the computer
Pin 13 LED: Usable LED without making an LED circuit
Serial LEDS: Shows if the Arduino is transmitting or receiving data from pins 0, 1 or the USB connection
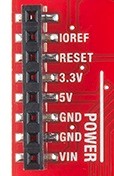
Power Pins
3.3V: Usually used to power low-voltage sensors
5V: Most common power pin used to power circuits
GND: Ground pin which is 0V
VIN: Voltage-In can be used to power the board using a battery
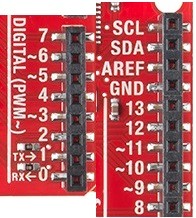
I/O Pins
A0-A5: Identical analog pins that can be used to read sensors or control analog devices. Pins A0-A3 are more stable than A4-A5
Pins 0-1: Transmit and Receive pins, don’t use these pins for this lab
Pins 2-12: Digital pins that can be switched between HIGH states and LOW states
Pin 13: Connected to the on-board LED, use it only as an input pin
Building Circuits on a Breadboard
Breadboards are small boards that are commonly used for circuit prototyping. They allow the connection of components that were discussed previously without making permanent connections.
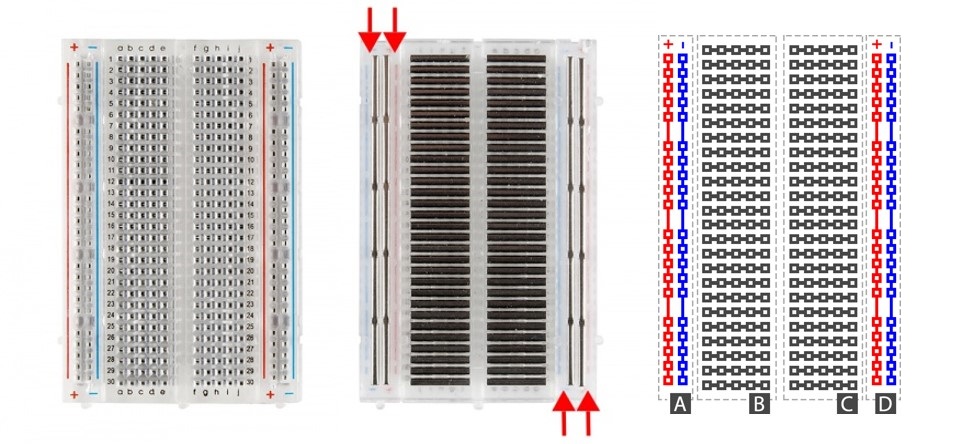
As seen in the Figure 1, the internal connections of a breadboard are very specific. Sections A and D depict how the power rails stretch the length of the board. This is where the 5V and GND connections from the Arduino can be used to power the circuits. Sections B and C are where circuits are built. Below is an example of how to wire a breadboard from a schematic. Do NOT build this circuit, just follow along. See the lab 5 NI ELVIS Tutorial Video on the EG manual for more information on how to use breadboards.
- Circle all the wire nodes in the schematic, in this case they are color coded. Every node will be a row used on the bread board.

